Resizing is the one image job where the damage is decided before you press the button, by which number you type and which shape you ask for. This is what each choice does to the picture, and which of them you can undo.
# How to resize an image without wrecking it
Resizing is the one image job where the damage is decided before you press the button, by which number you type and which shape you ask for. This is what each choice does to the picture, and which of them you can undo.
[Open the Image Resizer](https://abox.tools/resize-image/): Say the size. Draw the box. Pick the format.
Last updated 12 October 2026
## The short answer
Open the [Image Resizer](https://abox.tools/resize-image/), drop your picture in, type one number — the width, usually — and leave the other blank. The height follows from the shape of the picture, which is almost always what was wanted: “1920 wide” means “1920 wide and whatever tall that makes it”.
Everything below is what to do when one number is not enough: when you have been given a box with two sides, when the picture needs to get bigger, or when a whole folder of files has to come out the same.
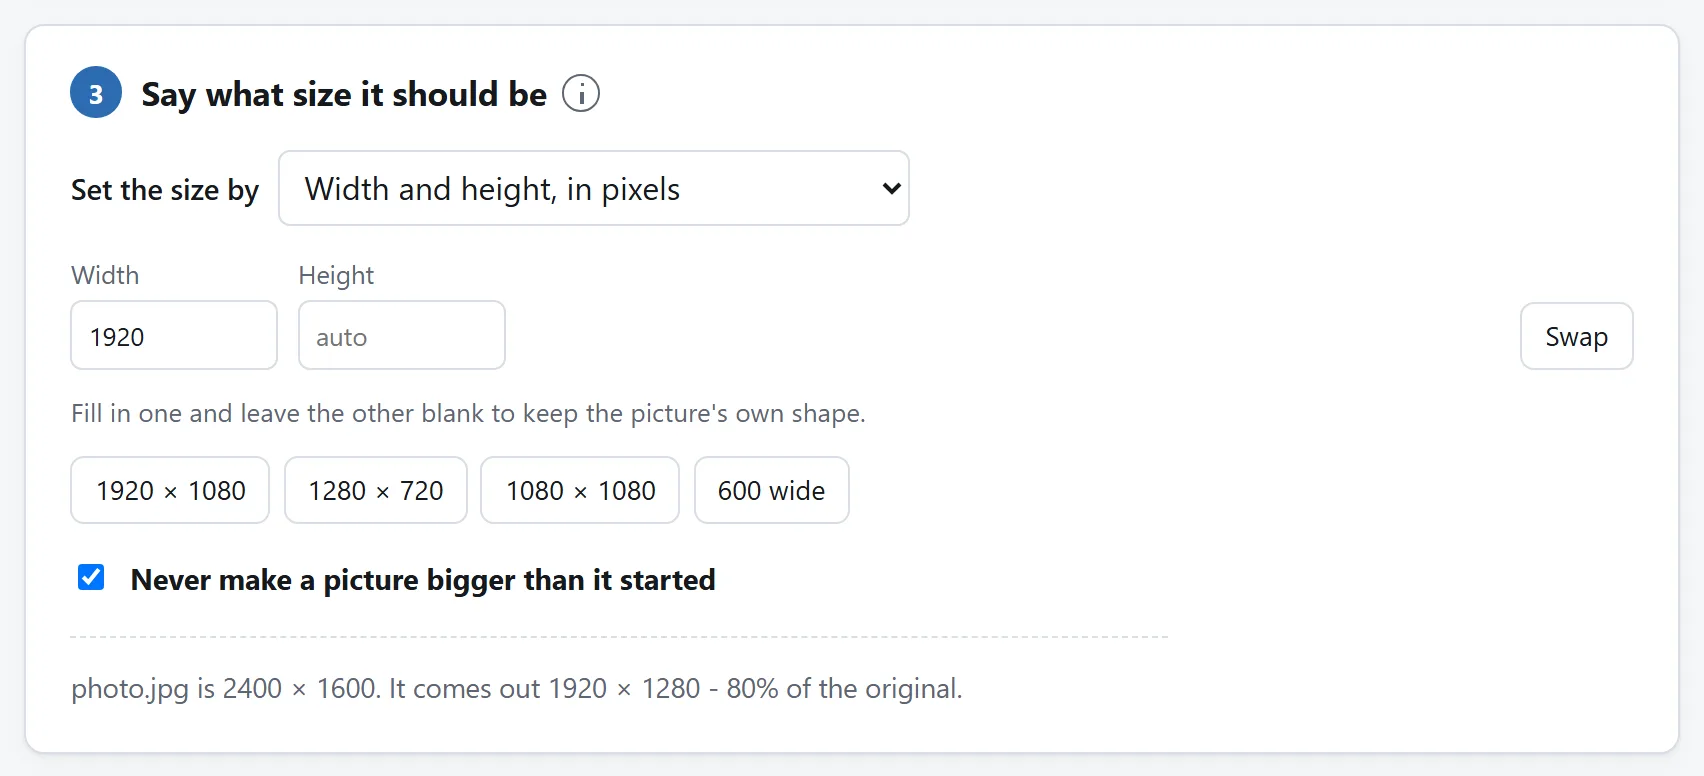
One number filled in. The tool works the other one out and says so before anything is resized.
## What shrinking and enlarging lose
These are not two directions of the same operation, and it is worth being clear about why.
**Making a picture smaller** removes information. Averaging real pixels can make a photograph look cleaner at its intended size, but small text, fine lines and texture may disappear. Compare at the size where the result will be used; fewer pixels are not a guarantee that every visible detail survives.
**Making a picture bigger** has to invent. The detail is not missing from the file; it was never photographed. All any enlarger can do is guess intermediate pixels from their neighbours, and a guess between two known values is a smooth ramp — which is why an enlarged photo looks soft rather than sharp. It is a bigger copy of the same picture, not a more detailed one.
That is why “never make a picture bigger than it started” is on by default in the tool here. Turn it off if you genuinely need the pixel count — a print shop asking for a minimum size, a template that refuses anything under a width — but do it knowing that you are buying pixels, not detail.
The machine-learning upscalers that do appear to add detail are a different thing entirely: they are inventing plausible texture from a model of what pictures usually look like. For a wallpaper that is fine. For a photograph of a person, a document, or anything anybody will draw a conclusion from, understand that the extra detail is fiction.
## Three ways to say what size you want
Most tools, including this one, accept the same three, and they suit different jobs.
- **Exact pixels.** Use this when somebody has specified the number: an avatar that must be 400×400, a banner that must be 1500 wide. Fill in one side and let the other follow unless you have been given both.
- **A percentage.** Use this when you want everything proportionally smaller and do not care about the exact figure — “half size” for a set of photos going into a document.
- **A long edge.** The most useful of the three for a mixed batch. “Longest side 1600” makes every picture fit inside a 1600-pixel square whether it is portrait or landscape, which is what “make these all a reasonable size” usually means in practice.
## When the box is a different shape from the picture
This is where resizing actually gets decided. If you give both a width and a height and they do not match your picture's proportions, something has to give, and there are exactly four things that can:
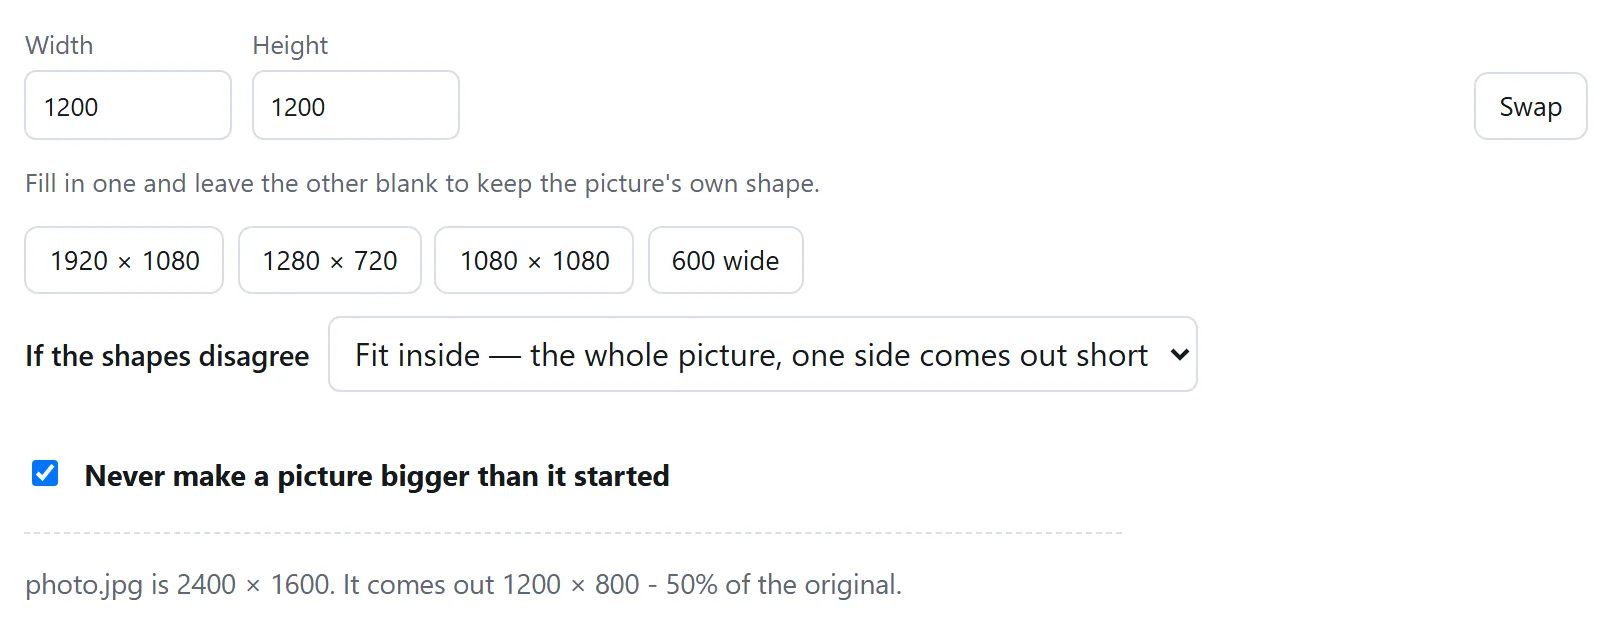
Fill in both sides and the menu appears. It is the only setting on this page that can lose part of the picture, which is why the four answers below are worth reading before it is moved.
- **Fit inside the box.** The whole picture is kept and comes out smaller than the box on one axis. Nothing is lost and nothing is distorted; you just do not get the exact dimensions you asked for. This is the right default for almost everything.
- **Fill the box and cut the overflow off.** You get exactly the dimensions you asked for, and the parts of the picture that hang over the edges are gone. Right for thumbnails, avatars and covers, where the shape is fixed and the subject is in the middle. Wrong when the thing that matters is near an edge.
- **Pad it out.** The whole picture is kept, centred, with the leftover space filled with a colour you pick. Right when a system demands exact dimensions and you cannot lose any of the image — product listings often work this way.
- **Stretch it.** The picture is squashed or pulled to fit. This is never what you want unless you are doing it deliberately, and it is the one that everyone recognises instantly as wrong.
If you find yourself reaching for stretch, what you probably want is crop.
## Cropping is a different job, and often the right one
Resizing changes how many pixels describe the whole picture. Cropping changes which part of the picture you keep. People reach for the first when they mean the second surprisingly often — “this needs to be square” is a cropping problem, not a resizing one.
Do them in that order: crop to the framing you want first, then resize the result to the size you need. Doing it the other way round means choosing the crop out of a picture that has already lost pixels.
The tool here does both in one pass for that reason — drag a box, lock it to a shape if you need a specific ratio, then say what size the result should come out. Doing it in one pass also means the picture is only encoded once, which matters for the reason in the next section.
### Cropping a whole batch
A box drawn on one picture is applied to the rest as the same *relative* area: the same fractions of each file's own width and height. For a folder of screenshots or exports that are all the same size, that is the same rectangle exactly. For a mixed batch it is the same framing rather than the same rectangle, which is usually what was wanted but is worth knowing before you trust it with fifty files.
## What the re-encode costs, and how to keep it to one
Resizing a JPEG or a WebP means decoding it, resampling the pixels and encoding again. Shrinking can lose detail at the resampling step; JPEG or lossy WebP can add compression artefacts afterward. These are separate costs, so inspect the dimensions and the encoded result.
Two things follow. First, the quality setting on the way out matters: somewhere around 80–85 is invisible for a photograph and considerably smaller than 100. Second, do it once. Resizing a picture that has been resized twice already means three generations of lossy encoding, and it shows.
A PNG has no such cost, because it is lossless — a resized PNG is exactly the scaled pixels. If you are working through several steps and the final format has not been decided, working in PNG in the middle avoids stacking up generations.
One detail worth knowing about the tool here: a file you are not actually changing at all is handed back byte for byte rather than re-encoded. Ask for “longest side 1600” on a batch and the ones that are already under 1600 come out untouched, tags and all. A tool that quietly re-encoded them would be costing you quality on files nobody asked it to change.
## Transparency, and what happens to it
PNG and WebP can store transparency. JPEG cannot — there is no alpha channel in the format at all. So saving a transparent image as JPEG has to put something behind it, and that something is a flat colour.
Most tools use white and do not mention it, which is fine until your logo lands on a dark page with a white box around it. Pick the colour deliberately, or save as PNG or WebP and keep the transparency. The same colour is used behind a padded frame, which is the other place people meet this by surprise.
## Which tool, if you were given a number
Two different numbers get handed out, and they need different tools.
**“1200 pixels wide”** is a dimensions problem. The [Image Resizer](https://abox.tools/resize-image/) is the one: you say how many pixels you want and it gives you that.
**“Under 500 KB”** is a file size problem, and resizing is only one of the ways to solve it. The [Image Compressor](https://abox.tools/compress-image/) searches for the highest quality that fits your target and resizes only if quality alone cannot get there; [its guide](https://abox.tools/guides/compress-an-image-to-a-target-size/) covers what that costs.
## None of this needs an upload
Decoding an image, scaling it and encoding it again are things every browser has been able to do for years — it is the same machinery a web page uses to draw a picture at a different size. There is no technical reason for your photo to travel to a server and back to come out smaller, and the tool here does not send it anywhere: the page's `Content-Security-Policy` names every address it may contact, and none of them belongs to this site.
Load the page, unplug from the internet, and resize something anyway if you would rather check than be told. [Is it safe to upload files to online converters?](https://abox.tools/guides/is-it-safe-to-upload-files/) sets out three more checks you can run on any tool.
The short answer
Open the Image Resizer, drop your picture in, type one number — the width, usually — and leave the other blank. The height follows from the shape of the picture, which is almost always what was wanted: “1920 wide” means “1920 wide and whatever tall that makes it”.
Everything below is what to do when one number is not enough: when you have been given a box with two sides, when the picture needs to get bigger, or when a whole folder of files has to come out the same.
One number filled in. The tool works the other one out and says so before anything is resized.
What shrinking and enlarging lose
These are not two directions of the same operation, and it is worth being clear about why.
Making a picture smaller removes information. Averaging real pixels can make a photograph look cleaner at its intended size, but small text, fine lines and texture may disappear. Compare at the size where the result will be used; fewer pixels are not a guarantee that every visible detail survives.
Making a picture bigger has to invent. The detail is not missing from the file; it was never photographed. All any enlarger can do is guess intermediate pixels from their neighbours, and a guess between two known values is a smooth ramp — which is why an enlarged photo looks soft rather than sharp. It is a bigger copy of the same picture, not a more detailed one.
That is why “never make a picture bigger than it started” is on by default in the tool here. Turn it off if you genuinely need the pixel count — a print shop asking for a minimum size, a template that refuses anything under a width — but do it knowing that you are buying pixels, not detail.
The machine-learning upscalers that do appear to add detail are a different thing entirely: they are inventing plausible texture from a model of what pictures usually look like. For a wallpaper that is fine. For a photograph of a person, a document, or anything anybody will draw a conclusion from, understand that the extra detail is fiction.
Three ways to say what size you want
Most tools, including this one, accept the same three, and they suit different jobs.
Exact pixels. Use this when somebody has specified the number: an avatar that must be 400×400, a banner that must be 1500 wide. Fill in one side and let the other follow unless you have been given both.
A percentage. Use this when you want everything proportionally smaller and do not care about the exact figure — “half size” for a set of photos going into a document.
A long edge. The most useful of the three for a mixed batch. “Longest side 1600” makes every picture fit inside a 1600-pixel square whether it is portrait or landscape, which is what “make these all a reasonable size” usually means in practice.
When the box is a different shape from the picture
This is where resizing actually gets decided. If you give both a width and a height and they do not match your picture's proportions, something has to give, and there are exactly four things that can:
Fill in both sides and the menu appears. It is the only setting on this page that can lose part of the picture, which is why the four answers below are worth reading before it is moved.
Fit inside the box. The whole picture is kept and comes out smaller than the box on one axis. Nothing is lost and nothing is distorted; you just do not get the exact dimensions you asked for. This is the right default for almost everything.
Fill the box and cut the overflow off. You get exactly the dimensions you asked for, and the parts of the picture that hang over the edges are gone. Right for thumbnails, avatars and covers, where the shape is fixed and the subject is in the middle. Wrong when the thing that matters is near an edge.
Pad it out. The whole picture is kept, centred, with the leftover space filled with a colour you pick. Right when a system demands exact dimensions and you cannot lose any of the image — product listings often work this way.
Stretch it. The picture is squashed or pulled to fit. This is never what you want unless you are doing it deliberately, and it is the one that everyone recognises instantly as wrong.
If you find yourself reaching for stretch, what you probably want is crop.
Cropping is a different job, and often the right one
Resizing changes how many pixels describe the whole picture. Cropping changes which part of the picture you keep. People reach for the first when they mean the second surprisingly often — “this needs to be square” is a cropping problem, not a resizing one.
Do them in that order: crop to the framing you want first, then resize the result to the size you need. Doing it the other way round means choosing the crop out of a picture that has already lost pixels.
The tool here does both in one pass for that reason — drag a box, lock it to a shape if you need a specific ratio, then say what size the result should come out. Doing it in one pass also means the picture is only encoded once, which matters for the reason in the next section.
Cropping a whole batch
A box drawn on one picture is applied to the rest as the same relative area: the same fractions of each file's own width and height. For a folder of screenshots or exports that are all the same size, that is the same rectangle exactly. For a mixed batch it is the same framing rather than the same rectangle, which is usually what was wanted but is worth knowing before you trust it with fifty files.
What the re-encode costs, and how to keep it to one
Resizing a JPEG or a WebP means decoding it, resampling the pixels and encoding again. Shrinking can lose detail at the resampling step; JPEG or lossy WebP can add compression artefacts afterward. These are separate costs, so inspect the dimensions and the encoded result.
Two things follow. First, the quality setting on the way out matters: somewhere around 80–85 is invisible for a photograph and considerably smaller than 100. Second, do it once. Resizing a picture that has been resized twice already means three generations of lossy encoding, and it shows.
A PNG has no such cost, because it is lossless — a resized PNG is exactly the scaled pixels. If you are working through several steps and the final format has not been decided, working in PNG in the middle avoids stacking up generations.
One detail worth knowing about the tool here: a file you are not actually changing at all is handed back byte for byte rather than re-encoded. Ask for “longest side 1600” on a batch and the ones that are already under 1600 come out untouched, tags and all. A tool that quietly re-encoded them would be costing you quality on files nobody asked it to change.
Transparency, and what happens to it
PNG and WebP can store transparency. JPEG cannot — there is no alpha channel in the format at all. So saving a transparent image as JPEG has to put something behind it, and that something is a flat colour.
Most tools use white and do not mention it, which is fine until your logo lands on a dark page with a white box around it. Pick the colour deliberately, or save as PNG or WebP and keep the transparency. The same colour is used behind a padded frame, which is the other place people meet this by surprise.
Which tool, if you were given a number
Two different numbers get handed out, and they need different tools.
“1200 pixels wide” is a dimensions problem. The Image Resizer is the one: you say how many pixels you want and it gives you that.
“Under 500 KB” is a file size problem, and resizing is only one of the ways to solve it. The Image Compressor searches for the highest quality that fits your target and resizes only if quality alone cannot get there; its guide covers what that costs.
None of this needs an upload
Decoding an image, scaling it and encoding it again are things every browser has been able to do for years — it is the same machinery a web page uses to draw a picture at a different size. There is no technical reason for your photo to travel to a server and back to come out smaller, and the tool here does not send it anywhere: the page's Content-Security-Policy names every address it may contact, and none of them belongs to this site.
Load the page, unplug from the internet, and resize something anyway if you would rather check than be told. Is it safe to upload files to online converters? sets out three more checks you can run on any tool.

