How to stack photographs to reduce noise, or remove people
A burst of frames holds more information than any one of them. Averaging them reduces independent random noise; taking the middle value of each pixel can remove things present in fewer than half the frames. Which one you want depends entirely on what moved.
Open the Image StackerTwenty frames into one, without twenty uploads or a RAW converter.
# How to stack photographs to reduce noise, or remove people
A burst of frames holds more information than any one of them. Averaging them reduces independent random noise; taking the middle value of each pixel can remove things present in fewer than half the frames. Which one you want depends entirely on what moved.
[Open the Image Stacker](https://abox.tools/stack-images/): Twenty frames into one, without twenty uploads or a RAW converter.
Last updated 8 October 2026
## The short answer
Open the [Image Stacker](https://abox.tools/stack-images/), drop the whole burst in, and pick the method by what you are trying to get rid of:
- **Noise**, and nothing moved — average.
- **Noise**, and something moved — sigma clipping.
- **People, cars, an aeroplane** — median.
- **A dark sky you want as star trails** — lighten.
- **A macro shot with almost no depth of field** — focus stacking.
Start with **Auto perspective** for noise reduction, including night-sky photographs taken on a tripod: the stars move even when the camera stays still. Use **None** for intentional star trails or frames that already line up. RAW files can go straight in when they contain a usable JPEG preview; the row shows the picture's actual size.
Everything below is why those five lines are what they are.
## Why a burst holds more than one frame does
A photograph taken in poor light is the picture plus noise, and the noise is different every time. That last part is what makes stacking work. Take the same shot sixteen times and the picture is identical in all sixteen while the noise is not, so averaging them leaves the picture and cancels most of the noise.
The improvement is the square root of the number of frames. Four frames halve the noise. Sixteen quarter it. A hundred cut it by ten. That is a brutal curve to be on — going from sixteen frames to sixty-four buys you the same improvement again, for four times the shooting — and it is why almost every practical stack is somewhere between eight and thirty frames.
Averaging also makes tone estimates more stable, because each noisy frame rounded a little differently. The tool uses wider accumulators and rounds the combined value at the end. The saved PNG or JPEG still has eight bits a channel: the cleaner average does not add output bit depth.
## The question that picks the method
Not “what do I want to keep” but **what was different between the frames**. Everything else follows.
### Nothing moved: average
The plain mean. It is the most effective noise reduction available on a set where the only difference between frames is noise, and it is the most easily ruined: one frame with a bird in it puts a faint bird across the whole stack, because a mean has no opinion about a value that disagrees with the others. It just includes it.
### Something crossed the frame: median
Line up a dozen photographs of a busy square and look at one pixel. In most of them it is pavement; in one or two it is somebody's coat. Sort those twelve values and take the middle one and you get pavement, because the coat was never in the majority.
Do that for every pixel and the square comes out empty. This is the trick behind every “remove tourists from your holiday photo” article, and it needs nothing more clever than a burst and patience. The one thing it demands is that **no part of the scene is occupied more than half the time**. A person standing still for eight of your twelve frames is the majority at those pixels, and the median will keep them.
### Both: sigma clipping
The median is less efficient than the mean at reducing independent random noise: its output comes from the middle value, or the middle pair, rather than an average of all the values. That is the price of being less affected by a few values that differ sharply from the rest.
Sigma clipping first estimates each channel's mean and spread, then averages only values within the chosen threshold. It can reject an object that crossed a small number of frames while averaging the remaining background. It is less reliable on small sets or when the object appears often. At the default threshold, one differing value among four identical values can still be accepted. Use median when removing the object matters more than getting the strongest noise reduction.
The threshold is in standard deviations, and two is the starting point. Lower rejects more and can reject real detail too. If every value for a channel is rejected, the tool keeps that channel's original mean rather than leaving a hole.
### Only the bright things matter: lighten
Keep the brightest value each pixel ever had. Photograph the night sky as two hundred thirty-second exposures and lighten them together, and each star draws its own arc across the result — a star trail, assembled from short exposures that never individually blew out. The same method assembles a firework from the frames of its own explosion, and a light painting from a walk around a dark room with a torch.
Its opposite, darken, is the quiet one of the pair: a pixel only stays bright if it was bright in *every* frame, so reflections in a window, passing headlights and raindrops lit by a flash all disappear.
### The subject is deeper than the focus: focus stacking
A macro shot at f/8 has perhaps a millimetre in focus, which is not enough for an insect. The answer is to take twenty frames along the focus ring and keep, from each, only the part that was sharp in it. The tool measures how much each pixel differs from its neighbours — large on an edge, near zero on a blur — and takes the winner.
This one wants a tripod more than any of the others, because moving the focus ring by hand moves the camera, and a frame taken from slightly further away is not the same picture at a different focus.
### A brighter blend: add
Add sums the decoded image values before applying the Exposure multiplier. These are eight-bit image values, so the result is an additive blend rather than a simulation of a longer camera exposure. It can clip bright areas. **Normalize brightness** sets the multiplier to one divided by the number of frames; you can also type a smaller multiplier directly.
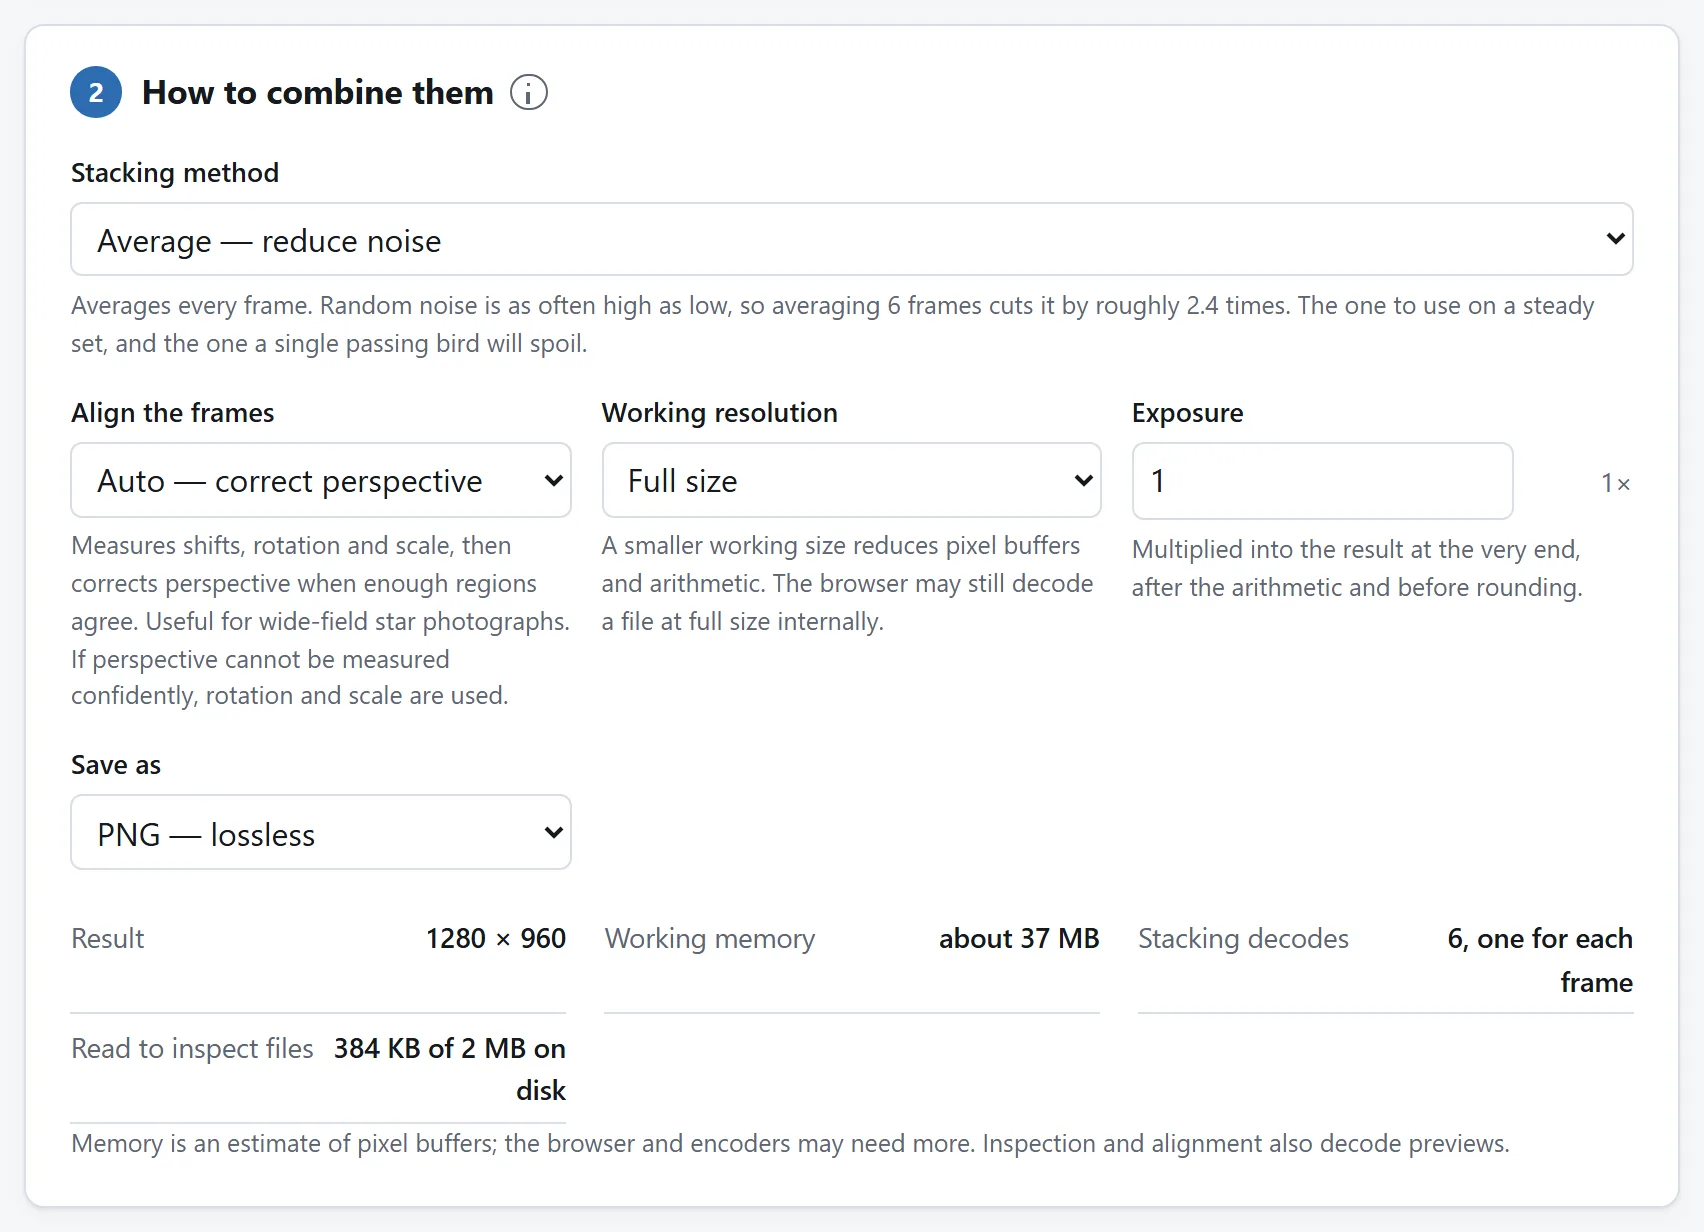
The mode is the question this section is about. The plan under it is the tool saying what the run will cost before it starts.
## Aligning the frames
Stacking is per-pixel arithmetic, so it assumes that a given pixel is the same part of the scene in every frame. Hand-held, it is not: a burst drifts by tens of pixels, and averaging that produces a blur rather than a clean picture. That is the single most common reason a first attempt at stacking disappoints.
Each frame is measured against the one marked **Reference** and moved back when a reliable correction can be found. The first frame is the default; **Use as reference** changes that mark without rearranging the list. Choose a sharp frame with clear, static detail. Four alignment settings:
- **Auto perspective** is the default. It corrects drift, rotation and scale, and uses a perspective correction when reliable measurements across the frame support it. This helps wide night-sky bursts where the centre lines up but stars near the edges still trail. It falls back to the simpler correction when a stable perspective fit cannot be found.
- **Shift only** for a burst that drifted without turning or changing perspective. It corrects translation alone.
- **Shift, rotation and scale** for a set where you were also turning slightly, or where a zoom crept. Estimating the extra correction adds measurement work even when the frames turn out to be straight.
- **None** when static frames already line up, or when you want moving stars to become trails. A tripod does not keep stars in the same pixels throughout a night-sky sequence.
What no alignment can fix is a subject that moved rather than a camera that moved, and it cannot fix a photograph taken from a step to the left either. Moving sideways changes how much the near things shift relative to the far ones, and no single correction describes both at once. Turning on the spot is fine; walking is not.
After stacking, open **Alignment details** to see each frame's status and correction. A frame that could not be aligned is still included where it was, so remove it and rerun if it makes the result soft. The result opens with the reference on the left and the stack on the right. Drag the divider with a mouse or finger, or focus it and use the left and right arrow keys. Move it to either edge to see a whole image. The divider is available in **Fit to window**. Choosing **100% — actual pixels** shows the whole stacked result and removes the comparison option. Use **Show** to inspect the reference or stack separately. Drag the image to pan around it, or focus the preview and use the arrow keys. Return to Fit to window to compare with the divider again.
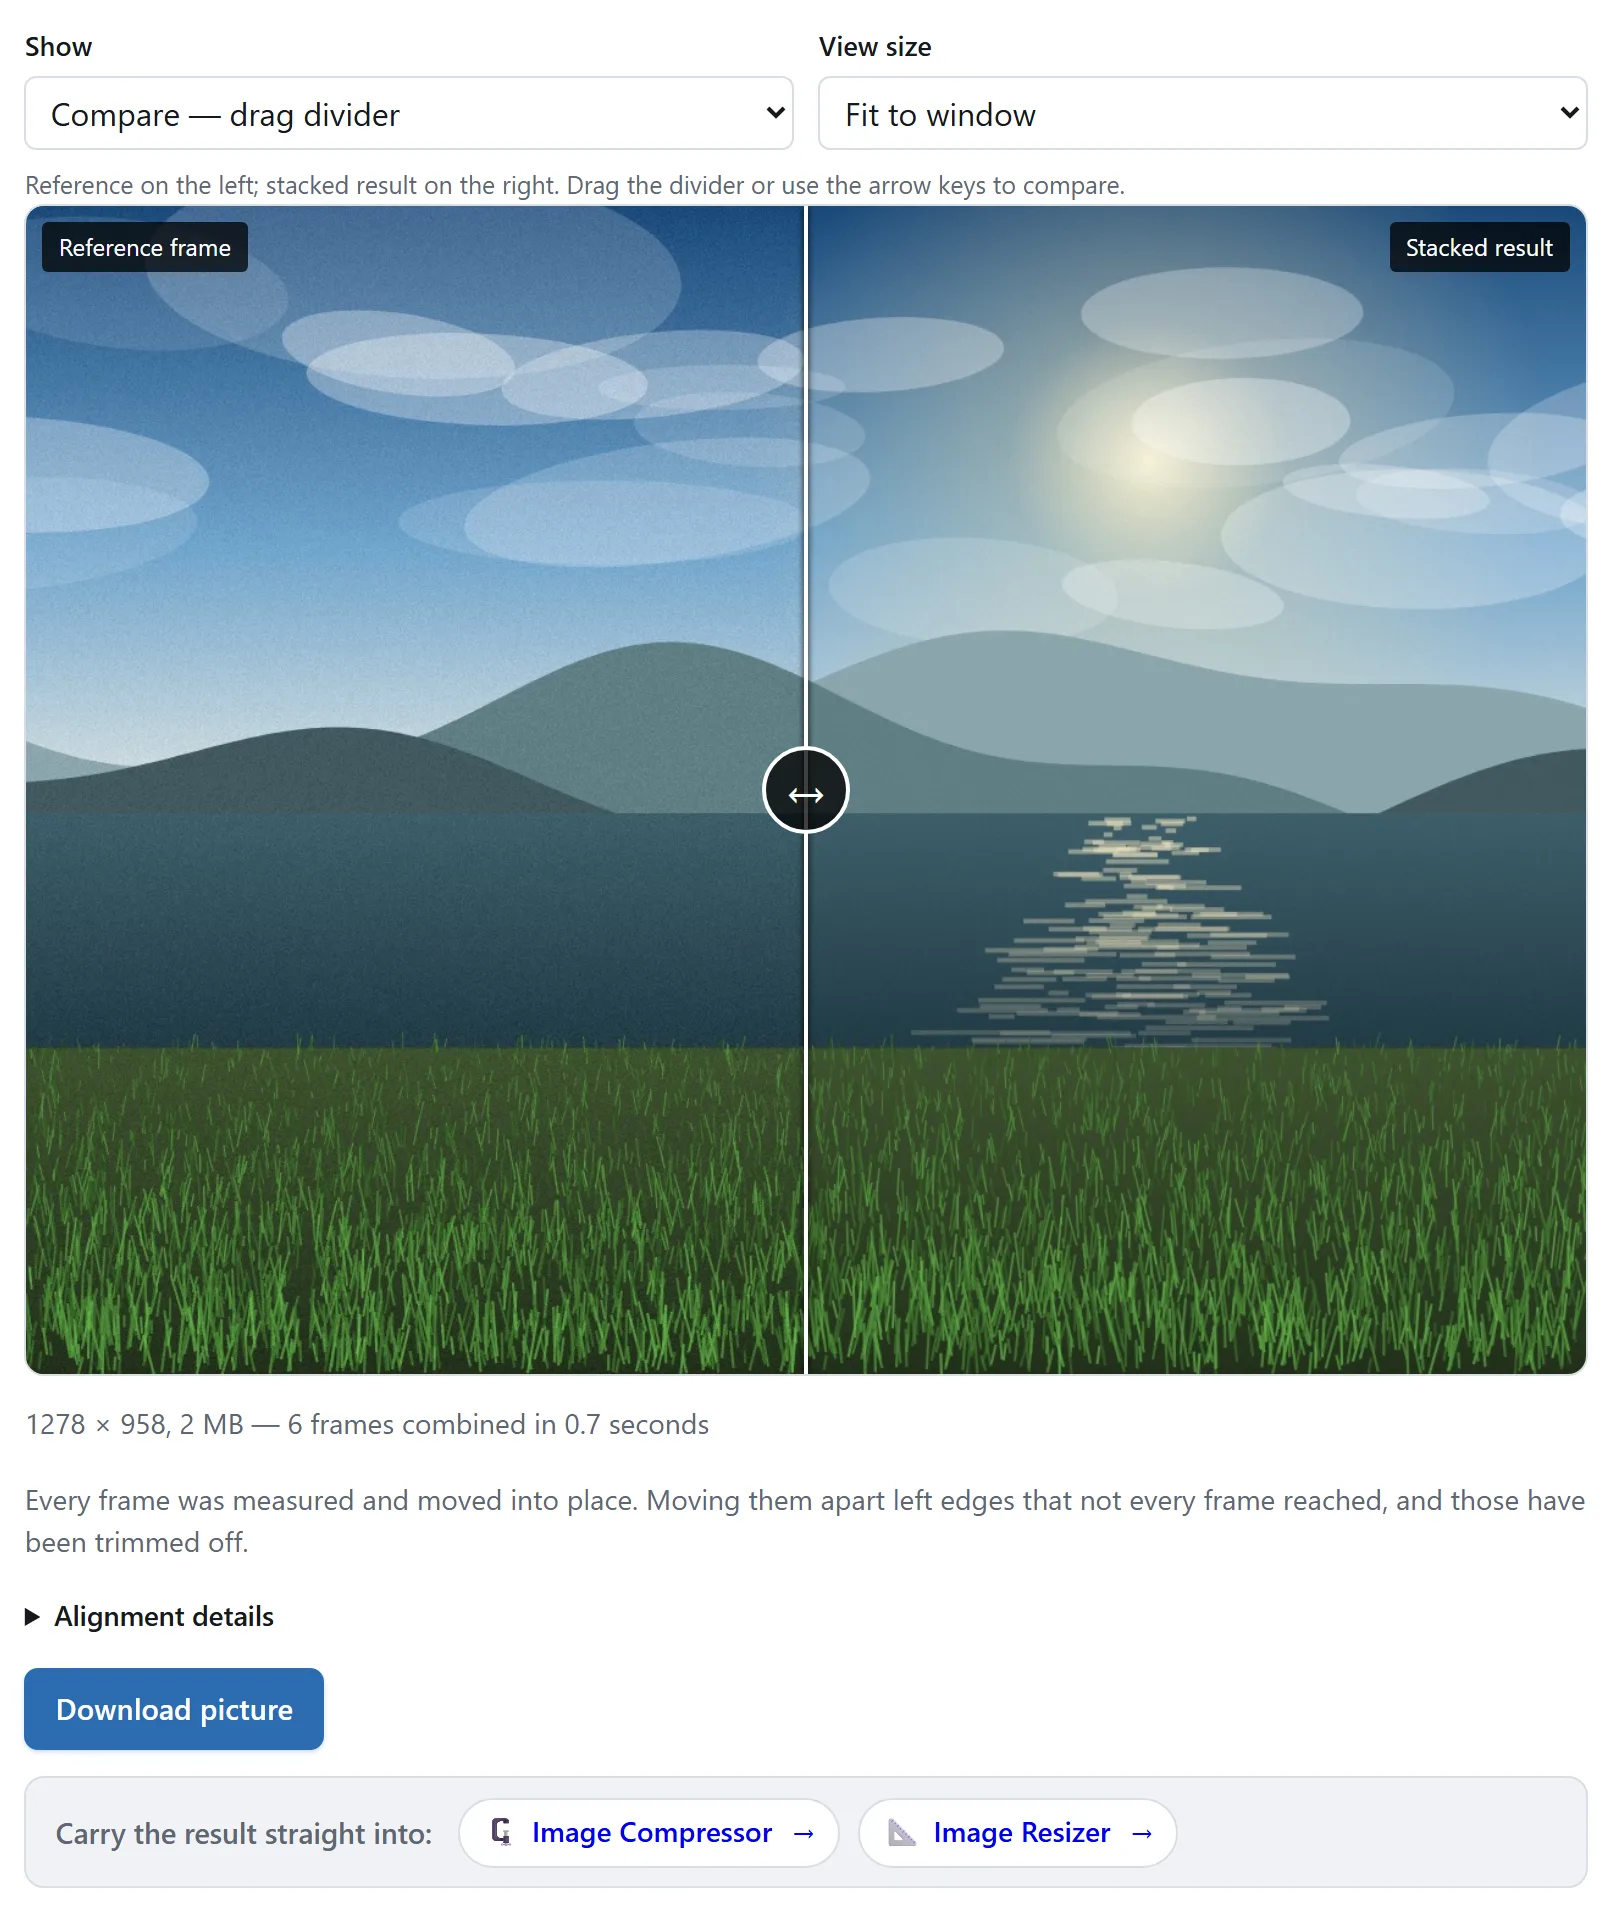
Move the divider across noise and fine edges to compare the same part of both images. Check the alignment details if the stack looks soft.
## Where RAW files fit in
CR2, CR3, NEF, ARW, DNG, RAF, RW2, ORF and related files can be opened when they contain a usable JPEG preview. What happens is worth being exact about, because it is different from developing the RAW sensor data.
Many RAW files contain a **JPEG preview rendered by the camera**. The stacker finds the largest usable one and decodes it with the browser's ordinary image decoder. That preview can be smaller than the sensor image, and some files have none. Check the dimensions shown for each frame.
Two consequences, one good and one worth knowing:
- **It avoids sensor decoding.** Finding the preview usually takes small directory and header reads, and the browser then reads the JPEG slice to decode it. The inspection figure shown on the page counts those directory and header reads; it does not count all the bytes read by the image decoder.
- **It is the camera's rendering, not yours.** Eight bits a channel, with the white balance and picture style the camera was set to — not the twelve or fourteen bits of linear sensor data you would get from a converter.
A usable preview can be enough for noise reduction, star trails, removing passers-by and focus stacking. Its dimensions and the camera's rendering are the limits. For your own white balance, tone adjustments or RAW shadow recovery, develop the frames first and export JPEG or PNG files to stack here. The saved result is still an eight-bit image.
## What it costs to run
Worth knowing because it is the difference between a stack that takes eight seconds and one that takes two minutes.
Six methods have accumulators whose size does not grow with the frame count. Average, lighten, darken, add and focus stacking take one stacking pass per band. Sigma clipping takes two: one to estimate the mean and spread, and one to average the values it keeps. Inspection and alignment also decode the files, so one stacking pass is not one read in total.
Median has to retain every frame's values for the band being combined. Twenty 24-megapixel frames would take about 1.4 GB just for those values. Bands let it work on fewer rows at once, at the cost of decoding each frame again for every band. The other methods can be banded too when their working buffers exceed the budget.
Before you press the button, the tool shows the planned result size, estimated working memory, planned stacking decodes, and bytes read during inspection. The memory estimate includes the modeled working buffers; browser internals and garbage collection can make total use larger. If the run will be banded, reducing working resolution cuts the picture's area by four per step and can reduce repeat decodes. Alignment may crop the result enough to need fewer bands than the initial plan.
## Shooting for it
Most of the quality of a stack is decided before any software sees it.
- **Shoot more frames than you think you need.** The square root curve is unforgiving at the low end and merciful at the high end: going from four to nine frames is a bigger visible change than going from twenty to forty.
- **Do not change the exposure between frames.** Stacking assumes the frames are of the same scene at the same brightness. Lock the exposure, or the tool will be averaging two different pictures.
- **For removing people, wait between frames.** A burst taken in two seconds catches the same person in the same place in every frame, and the median keeps them. Ten frames a few seconds apart works far better than fifty in a burst.
- **For star trails, keep the gaps short.** Lighten draws exactly what the frames recorded, so a pause between exposures becomes a visible dash in every trail.
## None of this leaves your machine
A stack of twenty RAW frames is around a gigabyte of photographs, which is a lot to hand to a website in order to have an average taken of it. The [Image Stacker](https://abox.tools/stack-images/) reads the files off your own disk and does the arithmetic in your own browser. There is no upload step, no account and no queue, and you can check that claim the way you would check anybody's: open your browser's network panel while it runs, or simply unplug from the internet and stack them anyway.
The related question — how to tell, for any tool, whether handing it a file was necessary — is [its own guide](https://abox.tools/guides/is-it-safe-to-upload-files/).
The short answer
Open the Image Stacker, drop the whole burst in, and pick the method by what you are trying to get rid of:
Noise, and nothing moved — average.
Noise, and something moved — sigma clipping.
People, cars, an aeroplane — median.
A dark sky you want as star trails — lighten.
A macro shot with almost no depth of field — focus stacking.
Start with Auto perspective for noise reduction, including night-sky photographs taken on a tripod: the stars move even when the camera stays still. Use None for intentional star trails or frames that already line up. RAW files can go straight in when they contain a usable JPEG preview; the row shows the picture's actual size.
Everything below is why those five lines are what they are.
Why a burst holds more than one frame does
A photograph taken in poor light is the picture plus noise, and the noise is different every time. That last part is what makes stacking work. Take the same shot sixteen times and the picture is identical in all sixteen while the noise is not, so averaging them leaves the picture and cancels most of the noise.
The improvement is the square root of the number of frames. Four frames halve the noise. Sixteen quarter it. A hundred cut it by ten. That is a brutal curve to be on — going from sixteen frames to sixty-four buys you the same improvement again, for four times the shooting — and it is why almost every practical stack is somewhere between eight and thirty frames.
Averaging also makes tone estimates more stable, because each noisy frame rounded a little differently. The tool uses wider accumulators and rounds the combined value at the end. The saved PNG or JPEG still has eight bits a channel: the cleaner average does not add output bit depth.
The question that picks the method
Not “what do I want to keep” but what was different between the frames. Everything else follows.
Nothing moved: average
The plain mean. It is the most effective noise reduction available on a set where the only difference between frames is noise, and it is the most easily ruined: one frame with a bird in it puts a faint bird across the whole stack, because a mean has no opinion about a value that disagrees with the others. It just includes it.
Something crossed the frame: median
Line up a dozen photographs of a busy square and look at one pixel. In most of them it is pavement; in one or two it is somebody's coat. Sort those twelve values and take the middle one and you get pavement, because the coat was never in the majority.
Do that for every pixel and the square comes out empty. This is the trick behind every “remove tourists from your holiday photo” article, and it needs nothing more clever than a burst and patience. The one thing it demands is that no part of the scene is occupied more than half the time. A person standing still for eight of your twelve frames is the majority at those pixels, and the median will keep them.
Both: sigma clipping
The median is less efficient than the mean at reducing independent random noise: its output comes from the middle value, or the middle pair, rather than an average of all the values. That is the price of being less affected by a few values that differ sharply from the rest.
Sigma clipping first estimates each channel's mean and spread, then averages only values within the chosen threshold. It can reject an object that crossed a small number of frames while averaging the remaining background. It is less reliable on small sets or when the object appears often. At the default threshold, one differing value among four identical values can still be accepted. Use median when removing the object matters more than getting the strongest noise reduction.
The threshold is in standard deviations, and two is the starting point. Lower rejects more and can reject real detail too. If every value for a channel is rejected, the tool keeps that channel's original mean rather than leaving a hole.
Only the bright things matter: lighten
Keep the brightest value each pixel ever had. Photograph the night sky as two hundred thirty-second exposures and lighten them together, and each star draws its own arc across the result — a star trail, assembled from short exposures that never individually blew out. The same method assembles a firework from the frames of its own explosion, and a light painting from a walk around a dark room with a torch.
Its opposite, darken, is the quiet one of the pair: a pixel only stays bright if it was bright in every frame, so reflections in a window, passing headlights and raindrops lit by a flash all disappear.
The subject is deeper than the focus: focus stacking
A macro shot at f/8 has perhaps a millimetre in focus, which is not enough for an insect. The answer is to take twenty frames along the focus ring and keep, from each, only the part that was sharp in it. The tool measures how much each pixel differs from its neighbours — large on an edge, near zero on a blur — and takes the winner.
This one wants a tripod more than any of the others, because moving the focus ring by hand moves the camera, and a frame taken from slightly further away is not the same picture at a different focus.
A brighter blend: add
Add sums the decoded image values before applying the Exposure multiplier. These are eight-bit image values, so the result is an additive blend rather than a simulation of a longer camera exposure. It can clip bright areas. Normalize brightness sets the multiplier to one divided by the number of frames; you can also type a smaller multiplier directly.
The mode is the question this section is about. The plan under it is the tool saying what the run will cost before it starts.
Aligning the frames
Stacking is per-pixel arithmetic, so it assumes that a given pixel is the same part of the scene in every frame. Hand-held, it is not: a burst drifts by tens of pixels, and averaging that produces a blur rather than a clean picture. That is the single most common reason a first attempt at stacking disappoints.
Each frame is measured against the one marked Reference and moved back when a reliable correction can be found. The first frame is the default; Use as reference changes that mark without rearranging the list. Choose a sharp frame with clear, static detail. Four alignment settings:
Auto perspective is the default. It corrects drift, rotation and scale, and uses a perspective correction when reliable measurements across the frame support it. This helps wide night-sky bursts where the centre lines up but stars near the edges still trail. It falls back to the simpler correction when a stable perspective fit cannot be found.
Shift only for a burst that drifted without turning or changing perspective. It corrects translation alone.
Shift, rotation and scale for a set where you were also turning slightly, or where a zoom crept. Estimating the extra correction adds measurement work even when the frames turn out to be straight.
None when static frames already line up, or when you want moving stars to become trails. A tripod does not keep stars in the same pixels throughout a night-sky sequence.
What no alignment can fix is a subject that moved rather than a camera that moved, and it cannot fix a photograph taken from a step to the left either. Moving sideways changes how much the near things shift relative to the far ones, and no single correction describes both at once. Turning on the spot is fine; walking is not.
After stacking, open Alignment details to see each frame's status and correction. A frame that could not be aligned is still included where it was, so remove it and rerun if it makes the result soft. The result opens with the reference on the left and the stack on the right. Drag the divider with a mouse or finger, or focus it and use the left and right arrow keys. Move it to either edge to see a whole image. The divider is available in Fit to window. Choosing 100% — actual pixels shows the whole stacked result and removes the comparison option. Use Show to inspect the reference or stack separately. Drag the image to pan around it, or focus the preview and use the arrow keys. Return to Fit to window to compare with the divider again.
Move the divider across noise and fine edges to compare the same part of both images. Check the alignment details if the stack looks soft.
Where RAW files fit in
CR2, CR3, NEF, ARW, DNG, RAF, RW2, ORF and related files can be opened when they contain a usable JPEG preview. What happens is worth being exact about, because it is different from developing the RAW sensor data.
Many RAW files contain a JPEG preview rendered by the camera. The stacker finds the largest usable one and decodes it with the browser's ordinary image decoder. That preview can be smaller than the sensor image, and some files have none. Check the dimensions shown for each frame.
Two consequences, one good and one worth knowing:
It avoids sensor decoding. Finding the preview usually takes small directory and header reads, and the browser then reads the JPEG slice to decode it. The inspection figure shown on the page counts those directory and header reads; it does not count all the bytes read by the image decoder.
It is the camera's rendering, not yours. Eight bits a channel, with the white balance and picture style the camera was set to — not the twelve or fourteen bits of linear sensor data you would get from a converter.
A usable preview can be enough for noise reduction, star trails, removing passers-by and focus stacking. Its dimensions and the camera's rendering are the limits. For your own white balance, tone adjustments or RAW shadow recovery, develop the frames first and export JPEG or PNG files to stack here. The saved result is still an eight-bit image.
What it costs to run
Worth knowing because it is the difference between a stack that takes eight seconds and one that takes two minutes.
Six methods have accumulators whose size does not grow with the frame count. Average, lighten, darken, add and focus stacking take one stacking pass per band. Sigma clipping takes two: one to estimate the mean and spread, and one to average the values it keeps. Inspection and alignment also decode the files, so one stacking pass is not one read in total.
Median has to retain every frame's values for the band being combined. Twenty 24-megapixel frames would take about 1.4 GB just for those values. Bands let it work on fewer rows at once, at the cost of decoding each frame again for every band. The other methods can be banded too when their working buffers exceed the budget.
Before you press the button, the tool shows the planned result size, estimated working memory, planned stacking decodes, and bytes read during inspection. The memory estimate includes the modeled working buffers; browser internals and garbage collection can make total use larger. If the run will be banded, reducing working resolution cuts the picture's area by four per step and can reduce repeat decodes. Alignment may crop the result enough to need fewer bands than the initial plan.
Shooting for it
Most of the quality of a stack is decided before any software sees it.
Shoot more frames than you think you need. The square root curve is unforgiving at the low end and merciful at the high end: going from four to nine frames is a bigger visible change than going from twenty to forty.
Do not change the exposure between frames. Stacking assumes the frames are of the same scene at the same brightness. Lock the exposure, or the tool will be averaging two different pictures.
For removing people, wait between frames. A burst taken in two seconds catches the same person in the same place in every frame, and the median keeps them. Ten frames a few seconds apart works far better than fifty in a burst.
For star trails, keep the gaps short. Lighten draws exactly what the frames recorded, so a pause between exposures becomes a visible dash in every trail.
None of this leaves your machine
A stack of twenty RAW frames is around a gigabyte of photographs, which is a lot to hand to a website in order to have an average taken of it. The Image Stacker reads the files off your own disk and does the arithmetic in your own browser. There is no upload step, no account and no queue, and you can check that claim the way you would check anybody's: open your browser's network panel while it runs, or simply unplug from the internet and stack them anyway.
The related question — how to tell, for any tool, whether handing it a file was necessary — is its own guide.

